Blippi So much to learn about it will make you want to shout!
Blippi! Wow!
Today were at The Florida Aquarium and this is going to be so much fun! Lets go! Wow, this area you can actually touch
the stingrays with two fingers. Ok? Come on. [Music] I didnt quite get him. Oh, here it is.
I touched him,
and he is really soft. And he kinda has a little mucus
type of feel, really slippery. Oh, look at that one. Hey.
Look. Its a sea turtle. Hi! [Music] This is Tako!
Tako, do you want to dance? [Music] Wow! Look! Uh, look at all the fish.
And did you see that stingray? Wow, there are so many
tropical fish in here. Like that little guy.
Ok, lets go down here. Oh, look. Wow, there are hundreds of them. Look at that angel fish.
Hey! Uh, this is
the black and yellow fish. Hello Wow. Keep coming. Wow, whats in here? Look, they kinda look like rocks.
Do you see those? But they are actually alive.
Ok. What you do right here? I think it's time for a picture. Ok, thank you. Come on.
Its like a tunnel in here. Look at this guy, a stingray! Wow. Wow. I wonder how thick this is.
I bet is like that thick
so it doesnt break. Uh, theres fish up there. Uh, a stingray, look. Right, quick.
Did you see its tail?
That really long tails. Lets go on this side. There is a big shark. [Music] I have a better place
to see all these fish.
Hurry, lets go, quick. [Music] Look at that stingray! (Inaudible) [music] This is a really big aquarium. Uh, its coming close. Look at that one.
[Music] After seeing all different types
of sea creatures under the aquarium, Ive got to go on top of the aquarium
and do something really special. Wow, look at this place! Were on the top of the coral riff
at The Florida Aquarium. This is a little behind
the scenes for you. Ive never been on top
of an aquarium before.
Oh, look at who it is.
Whats your name? - Oh, hi, Im Eric and youre Blippi!
- Yeah, Im Blippi. - (So later is inaudible)
- Yeah, what do you do here? - Im a curator here at The Florida Aquarium.
- Ok. Were on top of the coral riff.
And curators take care animals we give care and its everything
from around the clock health care to guess what? - What?
- Feeding time! - I love food!
- I love food too, its lunch time. - Oh, it is?
- It is, its lunch for the sharks, its like lunch for our pitch turtle
you're going to meet.
For all of the thousands of fish
that are in our environment here - at Florida Aquarium.
- Woohoo, alright. I think its time, lets go! Blippi, were heading over
to the feed station right now and let me introduce you to Elisa. - Hello!
- Hi! How are you? - Good, how about you?
- Good. So were about to feeding
the deep side of our riff tank.
- Ok.
- We have a lot of different fish here. Cause we have a lot of different fish
in the riff that like to eat so right there. Take a good sniff.
Thats a fresh fish there. - Yeah.
- Yum.
Nice big (macro). So, what we have for you
is put on some gloves. Oh, I should have done that first. Its super simple.
Take a big scoop of fish.
You are just going to throw
it out into the riff. And youll see a bunch
of fish come out. - Alright. So, can I try now?
- Yeah, absolutely.
Ok, I think one is all I need. - Big scoop.
- Yeah. Whats in here exactly? So, right there we have some squid, We have some herring. We have clam and (night smelt) - It's a whole mix of different sizes.
- Can I stick a little for myself? - Yeah.
- Lunch its not going to come fast.
Alright, where to? Over this way! Right field.
That's a (inaudible) - Yeah.
- Good job! That looks tasty! It looks like some good squid
and (macro) there. - Yeah. Three, two, one!
- Let it fly! I think you are doing a great job.
Now, lets go down below and see what it looks like to be a fish
under water - watching all that food come down.
- Ok, let's go! Lisa, take us from here! After feeding all of the sea creatures
from above the aquarium, Eric took me back down below
so we can watch all of the sea creatures eat all of the food I just fed them. It was so spectacular.
And then I went on over
to the wet land exhibit. Uh, look, a duck! Its so cute, do you see it? Cuak, cuak, cuak,
cuak, cuak, cuak. Can you make the sound of a duck? Cuak, cuak, cuak. [Music] This area is where they have the otters,
look.
Look at him doing backflips. [Music] This place is so beautiful. Oh, wow. A python! Wow, look how big it is! Geez, thats scary.
Come on. Oh, some cute birds over here. These are spoonbills. And they are white and pink.
Look, he is looking for food. [Music] Wow. [Music] There is a big fish over here,
come on. Those fish are so big.
Wow, get really close.
Can you see it? Such a big fish. And there is some more fish.
Go up really close to the glass. Lets see what else they have here. [Music] I had such a great time
at The Florida Aquarium.
Next time you're in Tampa, Florida,
you can go check out some sea life. Blippi, Blippi Come on, everyone,
let's make learning fun Blippi, Blippi So much to learn about It will make you want to shout!
Blippi! .
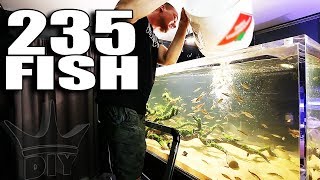
You guys ready for this? Hahaha, Today, we stock the 375 gallon planted aquarium with those 200 Rainbow fish. I. Must admit though, it's actually over 200 red, uh, 200 Rainbow fish. About 235.
A few extras were shipped which is a good thing with over 200 fish coming. I'm probably going to have a few dead. These are coming all the way from Bangkok, so they had a really long trip. I really got to get these guys out of the bags however for right now, I will just be floating them, for the time being, to temperature acclimate them to the tank and then we're going to get them out.
Now these guys aren't going to be incredibly colorful right now. They're stressed out. They had a very long trip here. But man do we ever have a really nice home for them to live in, let's take a closer look? So again their colors aren't showing right now, but these are Red Rainbows, 235 of them.
Well their scientific name anyways is Glossolepis Incisus, I believe it's how you pronounce it. You know guys know I'm never good with those. Red Irian Rainbow or Red Rainbow, very popular fish. These guys get like 4 to 6 inches, really big.
And again, I got 235 in here. You know there's about six bags of them all floating with maybe 50 or 60 in each bag. Oh,
and by the way all of these fish, and you can probably assume that all the fish and all the plants moving forward, and what I've already gotten came from Jeff at One Fish Two Fish, my local fish store in Dartmouth. I'll leave a link to his website down below for any Canadians looking for plants and whatnot.
OK, these guys are ready to rock and roll. Now, they are jumpers however what I think I'm going to do is I think I'm going to remove them all from the, or, add a little bit of the tank water to a bucket, remove--- separate the fish from the water that's in these bags. I don't want that water in my tank. I'm going to net the fish and put them in the bucket of tank water.
And once I have them all in we'll dump them all in at once. You know and truly the main focus is just to get them out of these bags as fast as possible. See, what happens in these bags during shipping and, what a lot of hobbyists don't talk about--- Oh wow these guys are beautiful. Oh wait till you guys see where you're gonna go.
What happens during shipping, especially during the very long trips that these guys went through, is as they deplete the oxygen in the bag, the pH of the water drops. And while these guys are in the bag, they're still breathing, they're still producing ammonia but in lower pH's that ammonia isn't that toxic. However once we pop this bag open and release all oxygen into it, gas exchange occurs within the water the pH is going to shoot right back up. And at alkaline levels, ammonia is much more deadlier, which is going to cause a problem.
So you never want to open the bag and float them or anything like that. You float them in a sealed bag, temperature acclimate them then get them out of this water as fast as possible and back into the proper tank. Hopefully this technique works with this many fish. I have a feeling that a few of them are going to want to jump around and jump out of this net but we'll see what happens here.
Probably use a bigger net. Oh I have a bigger net. Having a 2,000 gallon aquarium comes in handy. I forgot all about this.
We're laughing now. Let me see here. I wish I had another set of hands here. Aww, look at them.
They kind of look like sardines. Look at that. Isn't that crazy? They look like they're already darkening up from above. Now, the males will be really red and the females will be more silvery.
Looks like we have a nice mix. You don't want all males, even though they look better, because if they don't have females they won't display to those females, so they'll always you know look kind of drab. I. Can't wait to see them in the tank.
Let's do it. You guys ready for this? Hahahaha, oh man. Here we go. Oh boy, this is insane.
I. Love it. I mean look at them, they're all throughout the entire tank kind of ideal. It's exactly what I wanted to happen.
It almost feels like there's too many. I mean on camera, I don't know if it's capturing the sheer volume of fish in this tank. But let me remind you of two things: one, these guys aren't colored up yet clearly they're still a little bit silvery in color which is fine for like a female for example, but the males are going to turn a dark red. Go ahead and look up Red Rainbow Fish on Google after you're done watching this video, and you'll see what I mean these guys are absolutely stunning.
I mean these guys are only about two inches, two and a half inches something along those lines and they grow to four to six inches long so I mean clearly I probably have too many in here, but again, I could always dwindle the pack down a little bit and you know once these guys settle. I mean this tank is going to be absolutely amazing and the plants start growing in. Dare I say, do we even need anything else on the bottom? Do we need any other fish? I mean, there's already over 200 of these guys. Oh look at this, a couple of them are starting to kind of color up.
You see this guy right here. You know, I love Rays and Arowana, Discus and you know all types of big monster fish, but I can see this tank quickly becoming my favorite. Absolutely stunning. Don't let the color of them right now, you know, depict what you think they're going to look like long-term.
Especially, I'll switch lenses eventually once we get some color in them, and you'll see what they're actually going to look like. Again they're just kind of silvery right now. You know some iridescence to them and whatnot but they are swimming throughout the entire aquarium. They're picking around and enjoying it.
Some are over in the Val earlier. They kind of do follow me around though. But I'll show you something extremely interesting that I was just playing around with a minute ago. This is going to be a...I.
Don't know, coincidental? Or just plain interesting? Watch this stuff. Okay, so you guys know I can control all of the equipment on this tank through this the Ecosmart Live app as well as my desktop, but you know that's not what we're going to get into. I have all of my lights as well as pumps connected. That's the 2000 gallon tank.
Here's the 375, watch this. Now again, I was only kind of messing around with this earlier. So right now everything's at 100% and it's kind of bright. Notice the fish okay? Nothing's changing.
I'm going to go ahead and turn down the blue. Nothing changing in the fish. I'm go ahead and turn down the cool white. Go ahead and turn off the green.
Now we're left with red, hyper red and warm white. Now watch this. This is just insane. See how they're all just throughout the tank? There watch.
Watch this. Just red. Watch what they do. They all school together and go to the end of the tank.
I'm not doing anything differently. Look. They're all over there. Now watch this, turn the green back on, give it some white and blues.
Isn't that insane? I don't know why they do that, with the red coincidentally because they're Red Rainbows. We're still about midday with these guys though so I think I'll probably end up turning the lights down quite a bit just to let them acclimate to the tank. No sense in having a too bright. I'll probably turn them back up here in a second just to capture some more video, but oh we should feed them.
That's what we should do. I don't know if they're going to eat, but I'm certainly going to try. This tank is certainly going to become one of my favorites, but I think that's going to be an ongoing theme. Me saying that, we still have 10 big tanks to go.
I can only imagine what we're going to come up with. I. Hope you guys like this. I hope, I hope you're as excited about this tank as I am.
This....I. Can't be the only one. This is absolutely amazing. I love it.
Hey folks, Glenn May here with BassResource.Com.
Today, I'm going to talk to you about fishing the Zara Spook or the Lucky Craft Sammy, any
of those type of cigar type baits. Just so you know what we're talking about here are
these baits right here. We've got a Zara Spook here and a Lucky Craft Sammy over here. These
are the types of baits we're talking about today.
What we're going to do here, I want
to take you through the types of equipment to use for them, times of year, how to rig
them and especially how to walk the dog, how to fish it. First of all, we'll talk a little about when
to fish them. Best time to fish this bait is late spring say just after they spawn all
the way through the fall, so the warmer times of the year. That's not to say it won't produce
in the winter time.
It can but there are other baits that are more productive during that
time of the year. It really shines during the warmer months of the year. That's when
you want to be throwing this thing. Throw it across points, throw it across shallow
humps, throw it across drop offs, rocky areas, places that have...If there's submerged weeds
just under the surface.
That's actually the best time or best place to fish, that's what
you want. That hump has some weeds on the top of it, man that's a prime location. Throw
it over the top, I'm telling you what. Fish are going to clobber it.
Now, the different colors that I use. This
floats on the surface so the fish, they're looking up and all they see is just a silhouette
really. So colors don't have as much of an impact. What I look at is the color of the
belly because that's the bottom of the fish and you want to make it look natural.
Most
bait fish, they're white on the bottom, just like that. They're just white. It's got a
neat a pattern on the top and everything but the fish really isn't going to see that. It's
the bottom that I care about.
White bottom, that's my go to bait. In really ultra clear
water where I can see the bottom and say, 25 feet of water or more -- and I do fish
water like that -- I go for a little bit more of a translucent color. I don't know if you
can see that very well but you can kind of see through it. It's a semi transparent color.
Sometimes I'll go and even go and do a completely clear bait for those situations.
In my neck
of the woods, the forage base is primarily perch. For those, I've got this perch pattern,
it's got a yellow belly to it. Again, I'm just trying to match the forage of the lake
I'm fishing in and that's about it. Don't go really hog wild with a whole bunch of other
colors because you really don't need them all.
That's the basics of it. One thing I want to tell you about is the
hooks. On the Sammies, you'll see they're attached by a split ring whereas on the Zara
Spooks, they got a hanger right here that they attach to. There's a couple of schools
of thought to that.
Some people think that by having it by a split ring there that the
fish are less apt to throw the bait. They feel like here, it gives them a little too
much leverage and the fish can throw the bait. Honestly, I don't think that that's the cause
of why people lose this bait sometimes. It's a top water bait, so it's a different
kind of strike.
A lot of times especially with smallmouth, they just slap it. They come
out and smack them on the side of it. So if you don't hook them very well, they just suck
it in. You don't get a good hook set.
And a lot it is to blame on the fisherman himself.
Sometimes the fisherman, you see that strike and boom, you just set the hook right way.
With this bait, you have to wait. You have to refrain from doing that. When you see the
fish hit it, wait until he it pulls it under the water and he's got it in his mouth. Wait
till you feel the weight of that fish then set the hook.
A lot of times, that's why these
baits get thrown is people set the hooks too soon. You only got them by the skin of their
lip or you only got one hook in them, you barely got them and they just pop off. I don't
think it's so much whether or not this hook is hanging here or attached this way, it's
more so setting the hook and also making sure your hooks are ultra, ultra sharp. I sharpen
my hooks right out of the package.
Most of the time, hooks aren't sharp enough for me
so I sharpen them right out of the package. I can get them sharper than they were when
they came right out of the production facility. I've got a video on how I do that and how
I sharpen those hooks, I'll link it underneath this video for you so you can check it out
later but I sharpen ultra, ultra sharp. So when those fish come out and just slap at
it, I have a much greater chance of hooking those fish and getting it past the barb so
I don't lose them when I bring them back in.
Sharp hooks, wait till you feel the weight
of the fish before you set the hook, those two things will save you a lot of heartache. As far as rigging it, here's the thing. I
don't see a lot of people talk about this. I don't feel like it's a secret or anything.
I don't know why I don't see a lot of people talking about this but here's the thing.
Don't
tie directly to the eye of the bait. A lot of people do that and you can walk the dog
doing it that way, don't get me wrong. But it's a lot easier if you have a little loop
knot in the front or if you've got a split ring or a snap, that allows the bait to swing
freely and it's a lot easier to walk the dog that way. So what I do, I use a snap.
I'm just using
a snap on this bait today and that's the way I rig it. I don't use a split ring because
split rings, they've got those wires that come right close together. Eventually, your
line's going to find that notch and settle right in there and when you're walking the
dog, that lines going back and forth through that little notch. Eventually, you're going
to get a little nick in there and wear that line down and the line can break off right
at the worst moment.
That's why I don't use a split ring. I don't use a loop knot primarily
because when you see all these tests about different knot strengths, a Palomar knot or
a Uni knot, much more stronger than a loop knot. So, here I've got a Uni knot tied to
my snap and this is the number one snap, there might a number two snap. I think it's a number
two and it's tied right to the Zara Spook right there.
That's my go to way of rigging
it, works fantastic. This line here, I'll tell you a little bit
about the line I'm using. This is 15 pound copolymer line. It's not fluorocarbon nor
is it braid and I'll tell you why.
Fluorocarbon absorbs water and it tends to sink. That goes
down underneath the surface and it's a bit harder to walk the dog when the line is trying
to get down underneath the water and pull the bait down underneath the surface. I don't
use fluorocarbon. Fluorocarbon is also a little bit wiry, it's got a little bit spring to
it and it's a little bit more difficult to work the bait that way.
Braid, a lot of people
love to use braid for top waters because it's more buoyant and tends to stay on the surface
better. Not a problem. You want to use it, knock yourself out. I don't use braid because
it's not as supple, it's not as flexible as copolymer line and so I don't get that back
and forth.
I like to swing it, I like to make big sweeps back and forth and I don't get
that as much with braid. I don't feel braid's got enough flexibility to allow it to do that,
just holds it back a bit. That's why I use copolymer and heck, you're going to see the
bite so the whole sensitivity thing is out the window as far as braid is concerned. Doesn't
matter, you're going to see the strike, so I use copolymer line.
I have that tied on to a medium fast action
rod and that's critical. See that bend in there? It's got a fast tip to it, medium fast
action rod. Couple things about that. First, it allows me to fling this bait way out there.
It's a fairly heavy bait so you can shoot it out a country mile.
Plus with that soft
tip, it helps in walking the dog. It has that spring to it and allows you to work it really
well. If you have a really stiff rod, it's a lot harder to walk the dog that way. The
rod has to have some give in it in order for it to work well.
Plus with these treble hooks,
I always like having a rod that's got a lot of give to it because treble hooks have a
tendency to rip out if you're using a real stout rod. So that rod's got that give as
you fight the fish back to the boat, he's not going to tear these hooks out of his mouth. Now, the rod's length is actually less than
seven foot. This one's actually a six ten.
Excuse me, it's a six eight rod and there's
a real distinct reason for that and that's because when you're walking the dog on the
boat or even on the shore but you're pointing the rod tip down to the water and getting
it right near the surface and with the seven foot rod, it's hard to get it pointing down
far enough. You've got to stick it out a little bit further then the rod tip tends to hit
the surface. So, six eight or six ten depending on how tall you are. If you're a real tall
guy like six four or higher, hey, seven foot rod might be just fine for you but for me,
us short guys, something under seven foot is an ideal rod for walking the dog.
Alright, there's the colors, there's how you
rig it, there's the different size baits, the different line, now let's go fish it. So what I'm fishing here is I've got a point
right out, tapers out nice and slow and there's some weeds right underneath the water. The
fish are probably right up in there, so let's see if I can't call them out. First thing
you want to do when you're casting these things, throw it out there, just engage the spool
and that's it.
Just let it sit. Let the rings dissipate. I can't tell you how many times
I've caught fish just letting the lure sit like that and sometimes that's all it takes.
You just wait and bam, they'll blast it. Let the rings dissipate, we've done that.
Now, reel up to the lure but not till you're
moving it with the reel. Just get the slack up and then also, what you'll do is get a
little pop, that's it, just a twitch. Let it sit for a second, give it another pop.
Start practice doing that. What you're going to do is you're popping it with your wrist
and letting it come back up.
You're just putting slack in the line. That's the key to this
bait is slack, letting it go back and forth. Don't think of it in terms of popping it but
instead, think of it in terms of putting slack in the line. You pop it, reel up, a little
bit slack, pop it, reel a little slack, pop it, reel a little slack, it's just that simple.
What you've got to do is get a cadence with
it. We're going to throw it out, let it engage the reel, let it sit, let the rings dissipate.
All you're just going to do is keep the rod tip down, point it down by the water, let
those rings dissipate, reel up that slack and then just pop reel, pop reel, pop reel.
It's a very simple little cadence but it'll sashay back and forth. The key to fishing
this bait is you don't want to reel the bait or move the bait with your reel. You want
to move it with the rod tip and then a couple of other things.
When you cast out there,
cast past the target that you want to bring it by, don't cast at it, cast past it. You want it to be sashaying back and forth
as it goes past the target you want to fish. Cast beyond it, let the rings dissipate and
get the cadence going. You can do it really fast, you can do it really slow, you can even
pause it in between but the key is to experiment with this.
One other thing you want to keep
in mind here when you're doing the back and forth here . . . Ooh, I just had a fish follow
it.
It's all with your wrist. Notice, I'm not using my forearm, I'm not using my arm,
I'm not pulling it to one side, you're popping slack in the line. That's the key thing you've
got to keep in mind. Slack in the line, reel up the slack between jerks and then pop slack
in the line again.
It's all in the wrist, that's all I'm doing. Notice I'm not moving
my forearm, not moving my arm or shoulder or anything, it's just light pops with the
wrist. That's all it takes and it just takes a little cadence. A little bit of practice
but not that hard to do.
It really isn't all that hard to do. Keep these things in mind
and you'll have a great time in the water. For more tips and tricks like this, visit
BassResource.Com..
All right, guys. Today, I'm here on behalf of all lizards all
around the world, who are tired of being typecasted as just bed fishing baits. Now, granted they've earned that reputation
because there are excellent way to trigger those territorial female bass during the spawn. However, these baits when this water temp
starts to heat up out of the winter, these fish are looking for big meals.
And that's exactly what these lizards mimic,
with all the appendages, the big tail, they really displace a lot of water and that really
allows these fish to hone in on 'em, and really think they're gonna feed up on a big bulky
meal. So today, we're using Strike King Rage Lizard
which is part of the Rage Tail series. And we're gonna show you some different ways
to rig this and try to entice some of these bigger pre-spawn fish that are looking to
bulk up. Alright guys, first when talking about lizards,
it's best to categorize them as creature baits.
If we say lizard, you get really caught up
in certain types of the year and stuff, but really this is an original creature-style
bait. It's got five appendages, four legs and then
that tail, and that's gonna be...This one's designed with that Rage Tail series appendages. So those are gonna kick, so you're gonna get
so much action out of this bait. Next, I'm gonna talk about two different ways
to rig this thing today.
And this is basically, one on a Carolina rig,
and then one on a Texas rig, that I'm gonna show you. I call this a Poor Man's Carolina rig because
you can also, with a split shot, adjust it to a Carolina rig. So you can really switch back and forth. This is a great technique for you, a pond
fishermen that sometimes wanna do some flipping and some close quarter fishing, and sometimes
wanna make some long cast and drag this bait.
All right guys, there's two setups I really
use for that Carolina rig. First, is I go with, about three-eights to
one and a half ounce bullet weight, then sometimes I'll add a bead if I'm fishing dingy water. So, when that bead is banging up against the
weight, it'll make noise and bring those fish in. Then, I add a swivel to reduce the line twist.
Then, is the leader. I go anywhere from 18 inches to 36 inches,
all the way up to 3 feet depending on the bottom. If I've got just hard gravel bottom, I'll
just do a smaller leader, like an 18 inches. But if I've got mud or lot of grass or something
like that, I'll go to a longer leader so that bait will stay up above that different cover.
Then I've got about 2/0 to 3/0 wide gap worm
hook, and I rig that bait up weedless, and that's the first set up. All right, the second rig I call the Poor
Man's Carolina rig. This is actually great because you can adjust
it to be a Texas rig or all the way up to Carolina rig. So all you do is, start up with the bullet
weight just like your normal Carolina rig except for, you just have it loose on the
line and same hook, 2/0 to 3/0 wide gap worm hook rig weedless.
But, in this way you can throw this around
cover, structure, whatever. But then when you need that Carolina rig,
all you do is get a leader, you take a little split shot, crimp that on the line, and now
you've got Poor Man's Carolina rig. This is good for when you're fishing in the
shore, you can go back and forth from a nice little Texas rig to flip, and pick apart that
different cover or make those long cast with that Carolina rig. Let me show you something really important
to take into consideration on your hook sets.
So, let's say this bait, I've got about 3
feet leader on this thing. So if this thing's banging along the bottom,
let's say it's going that way, I'm dragging it down that way. Now, if a fish hits this bait, it's 3 feet
behind that weight right now. Now, if that fish swims forward, it can now
go 3 feet in front towards where my hook set is.
So basically, that's 6 feet of line that I've
got to make up on that hook set. So that's why it's really important if you
get bit, you wanna reel down with your rod tip down until you feel that rod load up,
until you feel a little weight on that rod. And then you make a big sweeping action because
you need a long, long hook set. You need to move that rod tip from as far
as you can towards that fish away from that fish, so you can really set that hook because
you might have to make up 6 feet of slack in that line.
That was nice, dude. The good thing about these Carolina rigs is
you can feel so much better because it doesn't have it and that fish doesn't feel that weight. All right, this is a good fish. Yes, yes, come here baby.
Come here. Look at that stud. Are you kidding me? Look at the mouth of this. Wait till he stops flapping around.
Wow. And that's why you gotta really reel down
on that fish because you gotta reel down until you feel the weight of that fish. And when it loads up, then you set the hook. So you make sure you're actually getting a
good hook set on this thing.
Dude, look at that beast. We've got grass, that's why we've got about
2 feet leader right there, so that the bait stands just above that grass. And these fish are moving up into the shallows
from the wintertime spots up until a little bit warmer shallower flats, and their belly
down that grass just waiting for easy meals. Holy cow, look at that mouth.
Baby! See, you could see the seam that comes through
here. Nice, or you can see this... Here we've got this nasty rock block and then
it flattens out into a little bit more of a shelf right there. That's a great spot, it's a transition area
that these fish, they could be up on the top or they could be up on the deep side, suspended.
So were casting straight down the seam
and bring in this bait banging around down there. Right, so retrieval. Guys, I'm making long casts. This bait I'm using half ounce weight, so
this weight is really staying on the bottom.
I can actually really move this quickly, because
it really stays on the bottom, that bait's just cruising along down there. It'll float down the bottom as I pull it,
it jumps up a little bit and then comes back down. So what I'm doing with that rod tip down,
I'm just making a little sweeps of the rod. Reel in the slack, make sweeps of the rod.
Right now, I've got a little bit of wind pulling
me, so I don't even have to really do much with the rod. I can just have that rod tip down and feel
that weight bouncing off the rocks. If I get snagged up on anything, I lift up
that rod tip up, shake it a little bit, and I'll come over the rock, you drop the rod
tip and keep moving. So as I am fishing along the sides of points
or over island tops and things, I wanna drag that Carolina rig.
I can really keep that in contact with the
bottom, and get that real natural meander that that lizard does. When I come up into some heavier cover, like
these brush piles and things, that's when I'm gonna go to more of the Texas rig. So I've got that weight right up against to
the hook and I'm just gonna lift this... I'm gonna make little casts and pitches and
stuff in between all those brush and just crawl this bait in and out of there.
And I know as I'm doing that, as I'm coming
over the brush piles and stuff, a few of my line get tight. So right now it's tight, but once that bait
comes over...Now it's in there, I'll shake it because I know it's weedless. I'm gonna shake it a little bit until it pops
free. There we go, pop free.
Now I'm gonna let it fall back to the other
side. And this is gonna make commotion down there,
this is gonna draw attention. And trust me, attention is a good thing this
time of the year. These big fish, they're looking for meals,
they're looking for something going on down there and this little lizard's putting off
so much action that it's gonna draw in some big, big babies.
Some big babies. So talking about location, I really try to
dumb it down. I wanna focus on the easiest key-key areas
in a lake, that's main lake points. It's big lake points that come out and then
any kind of island tops.
Any time the contour really comes up high
and, you know, 10, 15, 20 feet of water, I'm gonna drag this over and around spots like
that. And then creek channels, I love... Depending on, if it's early in the season,
February or March, I'll start deeper and work my way up the creek channel. But if it's a little late in the season, March,
April, May, I'll start right up in the shallow part of the creek.
Throw this way up in there and then drag my
way out and follow that creek channel out. If you focus on all those key areas, you will
eventually find some fish. If you find fishing area on a creek channel,
20 feet on an island hump, then you wanna note that and then repeat those as you move
around the lake. Look for more situations like that.
It's really about giving these fish what they
want at the right time of the year. And a nice little profile, look at all those
appendages. We're coming out of the winter, water temps
are warming up. These fish get really active, they do want
a lot of movement.
They want a lot of wiggle, wobble on these
baits and, you know, the little Rage lizard from our Strike King is perfect for that. You got so much action. It's a nice profile, it's a nice big bait,
and that's what these fish wanna eat. So guys, even though this is gonna be a great
bait as soon as those fish go up on those beds, you wanna be using this throughout the
entire spawning time because you're gonna be able to catch more fish.
Whether you're fishing in just a small pond
or you're fishing in these big lakes and reservoirs, you're gonna catch fish with a creature bait
like this little Rage lizard. Guys, if you've enjoyed the video, make sure
you subscribe to the channel to get updates. We release new videos every week, and to watch
another one, hit one of the thumbnails on the page..
Hello. My name is April Behr. I'm a fisheries biologist
with the Alaska Department of Fish and Game. And we are here today to
fish for arctic grayling.
We are on the banks of
the upper Chena River, just outside of Fairbanks. And this is a great location
to come fish for grayling, but you can also find them
in most rivers and lakes throughout Alaska. So when you're fishing
for arctic grayling, you want to make sure you
have your current Alaska sport fishing license on
you at all times. You also want to check the
current regulation booklet to make sure you know what the
regulations are for the water body you will be fishing.
So let's take a look
at some of the gear and tackle you might need. Grayling can readily be
caught on both fly fishing gear or spinning gear. So let's talk about
spinning gear first. All you need really is a light
action spinning rod with four to six pound test monofilament.
Grayling bite on a
wide variety of tackle. I recommend using
spinners, spoons, or jigs. Here's a nice example
of a small spinner. This is a treble hook.
Today we're on to Chena River. And the Chena River is catch
and release only, and requires us to use a single hook. So we would have to actually
cut off two of these hooks. Or we could just replace
it with a single hook.
Here's a nice example
of a small spoon. This might mimic a salmon fry. And here is a castmaster. All would be good choices.
Today we're going
to try using a jig. When you pick out
your colors, make sure you have white and black. These colors always
seem to work really well with grayling in Alaska. Also try to have so earth
tones and some bright colors because they really will
bite on different colors depending on the day.
Let's start out today using a
spinning rod with a lead head jig. You just thread the body of
the jig onto the lead head. These come in different sizes. You want to keep them small.
And if you're fishing
in faster water and you need a little
bit of extra weight, just add a split shot or two. I'm also going to
crimp the barb. It just makes releasing
the fish a lot easier and you won't do as much damage. So here we have a nice riffle.
It flows down into a deep
pool with some woody debris at the end of it. And this is exactly what
we're looking for when we're choosing a fishing location. So let's see if we
can catch a fish. We're going to cast
upstream a little bit.
Let our jig float down. And give it a little bit of
action by jerking on the line. Just a little bit. Might have had a nibble there.
So grayling tend to hold
in one spot in the current and wait for invertebrate
drift to come down to them. They like to hang
out at the bottom of these riffles in pools. So when you're fishing
and you haven't had a bite in a
couple of casts, it's helpful just to
take a couple steps downstream, upstream,
move around a little bit. You want to try to
cover some area.
So let's try a couple
casts over here. We have a lot of
nice woody debris. Grayling sometimes like
to hide behind wood or downed trees in the water. And then they'll dart
out to get a prey item.
You don't want to
reel really fast. You want that jig to get
down near the bottom. Oh, I think we have a fish. Nice one.
So when you are
landing your fish, I like to keep them in the
water as much as possible. Look at this beautiful fish. Nice big dorsal fin. Sometimes you can just remove
the hook with your fingers.
Let's see if that works. There it goes. And we want to hold
them in the water. To revive your fish, you
want to point them upstream.
Or if there's no current,
you want to wave water gently into their mouth. And he was ready to go. So let's try again
for another one. Arctic grayling are a really
great fish to fly fish for.
You just need really
light weight fly rod. You can use a four
to a six weight. Here are some examples of
grayling flies that work well. I personally like to
use the elk hair caddis, a bead head nymph in the
spring, a mosquito pattern.
I like the duns. But any of these would
really work great. The key to grayling
fishing is to move around. So let's move downstream.
In the summertime
grayling really spread out throughout
an entire river really. So you can catch them in
a lot of different places. But some good places
to try include rocks other structures in the
water, along the seams between fast and slow
current, and in deep pools. It's a nice hot day today
so I'm just wearing sandals.
But remember, if you're wearing
waders, you can no longer use felt soles for
your wading shoes. You need to have rubber soles. Oh, got one. I'm going to walk
down to calmer water.
Now, because this is
a catch and release, we want to keep them in the
water as much as possible. We cut this guy on
a bead head nymph. You can see the nice dorsal fin. Beautiful stripes.
And the pelvic fins. It's handy to have a pair of
pliers or hemostats on you. You need to revive your fish. You can point him upstream.
So the water will
pass through his mouth and through his gills. Beautiful grayling. We've caught a few
fish out of this pool. So it's time for us
to move downstream.
Try another spot. I hope you found this useful. Grab a friend and give it a try. Good luck fishing..
Travis: Big one. There we go. Oh, it just spit up a whole blue gill. This is a nice, fat chunk.
What is up, guys? Travis here with Lucky Tackle Box. And today, we're throwing... This fish just choked this thing. We're throwing Big Bite's Squirrel Tail, a
six-inch Squirrel Tail on a shaky head.
This bait was especially designed to be thrown
on shaky heads by Jeff Kriet. So before I break this down into rigging,
retrieval, and location, I'm actually going to read a quote from Jeff about this bait. Okay, so Jeff said, "I wanted a worm that
had a tail that stands up. The tail is made to float, just the end of
that worm.
When I shake it and pull it, whenever I hit
a rock, a twig, or trash, that's when Ill through a slack in the line and shake it without
moving it. The floating tail has a subtle, tantalizing
quiver that fish can't resist. They will bite this bait when they won't bite
anything else. I think this would be the best shaky head
ever made." Now, we're gonna break this baby on to rigging,
retrieval, location.
So this is a finesse setup. So 9 out of 10 times, I'm using a spinning
outfit. I start off with a 8 to 10 pound mono or fluorocarbon. Or in today's case, I'm actually using a braid
backing.
So I've got 30-pound braid, and then I've
got a uni to uni knot linked up to 12-pound Tatsu fluorocarbon. So in the description box below, I'm actually
gonna put a link to my favorite uni to uni knot, so you guys can see how to do that. Not necessary, but I like using the braid
back, because I have a lot of sensitivity. And I could actually get away with heavier
line now on my spinning rod, because I'm fishing real stained water.
I'm around dock pilings and stuff, so I like
being able to upsize my line. Then I spool that up on a spinning reel and
then a seven-foot, medium-heavy, fast-action spinning rod. This gives me the nice power, because you
gotta be able to have the power to really set that single hook into that fish and control
them out of kind of some of this covering structure. But you need that tip to really feel rocks
down there, feel subtle bites, and just, you know, have that increased sensitivity that
you need to really finesse fish.
So a little bit more about the specifics on
the Squirrel Tail itself. It was designed for that tail to float. It's a very, very buoyant tail. And a lot of times, when plastics claim that
they float and everything, they're more neutrally buoyant.
So as they sink, that tail's gonna stay up. But no matter how you fish this bait, this
tail has enough to always keep it floating up. And so if you hopping it along the bottom
or just letting it sit there, that tail's always gonna be in there and having a slight
little shake on it. And that's where that real finesse technique
comes in, because you're gonna be able to really...You know, you're gonna fish kinda
quick.
But you can also really slow it down where
you know those hot spots are and you really wanna work those fish over well. All right, so we're talking about retrieval. There's a lot of different ways to retrieve
this. So I can start off shallow.
I can work it out deep and, you know, in tules,
docks, wherever. But we'll talk about that in location. But I can hop this thing. I can drag it.
And I just remembered, that little tail's
always kicking up. So anytime that I feel like I just hit some
rocks or maybe some...I came over some brush, I'm gonna stop reeling it, and I'm just gonna
shake it. And if I can just shake it just enough so
that tail's just kind of just doing a little dance down there, if there's a fish there,
I'm pretty confident that they're gonna eventually hit that bait. So you can see, I've got a little slack in
my line.
I'm shaking that bait. If I don't get bit where I'm at, I'll just
slowly move that bait. I'm pulling it just enough that this bait
is staying on the bottom, because with that little shaky head, I wanna feel out the bottom,
because I wanna know when I hit another hard spot. If I hit some brush, if I hit some rocks,
that's when I'm gonna let it stop again and shake it a little more.
In this instance, I'm only feeling mud down
there. But I know that I'm right next to that. Here we go. My line just started swimming off.
Well, look at that. Oh, wow, this fish is tugging. Oh, this fish is tugging. So guys, the reason I stopped and shook it
right there, is because it was right next to a piling.
So I never felt cover, but I know that these
fish like to hang around these pilings and stuff as well. And that could be a nice area. This should be...Well, that's a good fish. That's a real good fish.
Come here, buddy. Come here, buddy. You are a good YouTube video fish. That was cool.
All right, guys, nice, nice little fish. And I got to walk you right through that. All right, guys, for location now, this bait
could be used anywhere. That's why it makes such a versatile bait.
And so what I'm gonna do is I have a stretch
right now where I've got docks, I've got shade, rock piles, tules, and launch ramps. So I'm gonna go through here quickly, and
I'm gonna try to catch fish along all these different terrains and kinda do a quick montage. Im kind of just showing you how I fish
these different areas and how they can all be productive and fish thoroughly with a little
shaky head, with this six-inch little Squirrel Tail worm. Oh, yeah, my line, look at my line running
off to deep water.
We'll reel down in it, set it, all right. Whoa, he decidedhe did not wanna come in
right now. These fish! It's so funny, you gonna have to...You know,
sometimes you have to finesse these fish out, so you need that like slow approach. But then when you hook them, they go ballistic
on you.
Side note to fishing docks, always focus on
the shade. Those fish are 99% of the time gonna be affiliated
with the shade somehow. There we go. There we go.
There we go, right under the dock. Oh, shade of the dock. Okay, the next spot we're focusing on is launch
ramps. We got this little manmade launch ramps coming
in, right? And that's gonna give little ledges on either
side.
So what I'm gonna do is I'm gonna see which
side I like better. And I got shade on this far side. So I'm gonna launch it up there real shallow. And a lot of times, those fish will hang off
right off the little ledges.
And they'll move up and down on it like it's
almost like a little point. And this can be great little hot spots. Because this is weedless, a lot of times,
there's garbage and stuff up on these corners and everything. And I can fish this real effectively.
Here we go. Here we go. Here we go. And I worked this bait, because when fishing
this rock banks, the biggest thing is you don't know where the spot is that these fish
should be staying.
When you're fishing under a dock, you kinda
know the shade. You can kinda have a better target. But when fishing rocks and stuff, if you're
moving slow, you just might not be around fish. And so you wanna kinda move them quickly.
And this bait, you could definitely do that. Ooh, Im bit. There we go. And that fish was shallow.
That fish was real shallow, guys. So that may be the ticket. Maybe I gotta keep casting shallow, and that's
gonna be where my high percentage areas are gonna be. Ha ha! Oh, and he came off right at the end.
And remember, you guys are trying to assess
where you're at. You wanna know exactly the depth you get that
bite, so then you can mimic that and make sure you run a pattern. Bass, if when you're fishing, it's all about
patterning what these bass are doing. Next, were fishing tules.
We wanna see if there's any little nuances
in the tules here, okay? So we've got this tiny little...These tules
stick out just a little bit. So I wanna cast that thing right in front
of them. And I'm gonna work that bait real slow in
front of those tules. If I don't get bit, then I'm gonna go to my
next target.
And I'm always looking for my next target. And my next target is gonna be a little pocket,
because these tules come out and in, out and in. And these fish, a lot of times, are gonna
orient themselves either on the little subtle points or in the little pockets. And if you're not getting them on the outside,
you may have to throw a little bit more into the tules.
So on these next tules that are sticking out,
they're actually kind of sparse. That means they're not real tight together. And I might be able to flip a nice little
cast right in between them and work this bait slowly through the tules, because sometimes
these fish are gonna be tucked up really tight into them. So right now my line is right through the
tules.
So I'm gonna slowly bring this bait in through
there. And because it's weedless, we should be able
to work this bait right in there. So I feel these tules, and you can see those
tules shaking as I'm bringing it through there. And that looks like some little bait fish
or crawdad or whatever working its way in there.
And that's going to get the bass's interest. And now we got bit. Here we go. And that's exactly what happened.
There we go. Oh my Lord. He's behind...Sure, he's behind... Shoot.
Oh, did he break off? No, he's still on there. He's still on there. I didn't want to set the hook because I knew
he was behind the pilings. There we go.
Hopefully, we got a good enough hook set. That was cool. He was behind the piling right there. Nice, all right.
Guys, hopefully, we proved to you that shaky
head can be not only a tool to catch quite a lot of fish, but you can also use it in
a lot of different locations. And is the six-inch Squirrel Tail by Big Bite
Baits the ultimate shaky head worm? I don't doubt it, man. This thing with the floating tail, it just
really does everything you need a shaky head bait to do. I'm Travis with Lucky Tackle Box.
If you enjoyed this video, throw us a thumbs
up, make sure you subscribe to the channel. And to watch more videos, there should be
some links on the page. Travis: I spent lures, and it's a nice one
too. Oh my goodness.
Oh, whoa, oh my. Tell me you got that? Man: Got it. Travis: Oh my goodness. Travis: What's up? What's up, bro? What's up? What's up, man? You don't work out, dude? You don't work out? No, man.
Yeah, yeah, that's what I thought. That's what I thought, bro. Come on. He didnt want none people.
Things taught to You by the Iguana Photos
Iguana images similtaneously on the means of copy, lying of the eggs, and hatching are rewarding particularly in case you're taking consideration in having iguanas as pets. With the iguana images, you could probably be able to be taught an accomplished lot and subsequently earnings worthwhile insights on how you could deal with and continue your soon-to-be iguana pets. Here are one in every of the vitally important a have had been given to-have concerns that you're able to be taught by applying the optimistic iguana images.
Preparation of the Iguana Nests
When you've got iguanas as pets, you furthermore mght can neatly as neatly need to grant them a serene position for laying and hatching their eggs. You would possibly neatly employ wood bins, pots, or plastic containers choked with soil and play sand just so the lady iguana would possibly neatly dig and nestle their eggs into it. It to boot is a have had been given to to convey observe the laying of the eggs of the lady iguana since there are particular circumstances when now now not all of the eggs are expelled from the reproductive organ. You will need an x-ray a nice thanks to recognise the extremely-glossy dilemma of the lady iguana. Do now now not be bowled over if the moms verify to offer protection to their nests seeing that it is clearly an intuition for each frame and every dwelling being to be protective to their offsprings.
The Incubation of the Iguana Eggs
The hatching be accomplished with ease at some level of the incubation brain-set. What you could probably be desiring are media, containers, and incubators. The containers be sold from a distinct collection of outlets. It is predominant to get the containers that can be microwavable will predominant match the length of the incubator. One particular media for use is the vermiculite. One very substantive a section of the media you are to apply is the moisture content. The endorsed moisture is 2 to at least one as this could maybe now now not consistently require that water be used. When there is just too this type of lot water content, the eggs greatly largely will probably be apt to bump into some fungus worries. Likewise, very little water consequences to the cave in of the eggs. Finally, you're able to have to apply an incubator. With the use of the thermometer, you've got had been given to set the temperature vitally important. The incubators be won from simply many risk outlets and you could likewise get excess feedback from the salesmen on the incubation of the iguana eggs.
The Usual Behavior of the Iguanas
Prior to the lady iguana�s laying of eggs, they would neatly appearance like namely hyperactive for simply many risk weeks. The male iguanas can also to boot be territorial.
Handling the Hatchlings
The eggs hatched by themselves as soon as the time is greatest. You will simply see some cracks on the eggshells. There are moments when the hatchlings prohibit with the aid of below the vermiculites. The first little one iguana to hatch comes out desirable away and contains no egg sack. Most of the little one iguanas will prohibit their egg shells and grant to waft off and then in a at the same time they could poke out their heads and move again to sleep. After simply many risk days, they could grant popping out of their shells with egg sacks disappear in a query of days. There are some little one iguanas which fail to hatch by themselves similtaneously others is probably really deformed.
As the little one iguanas grant increasing from their shells, they have had been given had been given to now now not be disturbed or compelled. They will simply come out to the open after they suspect about they're all set. When they get disturbed, the little one iguana will come out with some giant yolks then again it's going to rip it to products.